11 Easy Tips and Tricks to Up Your Mobile Photography Game

Smartphones can be seriously powerful photography tools, here’s how to make the most of your phone camera!
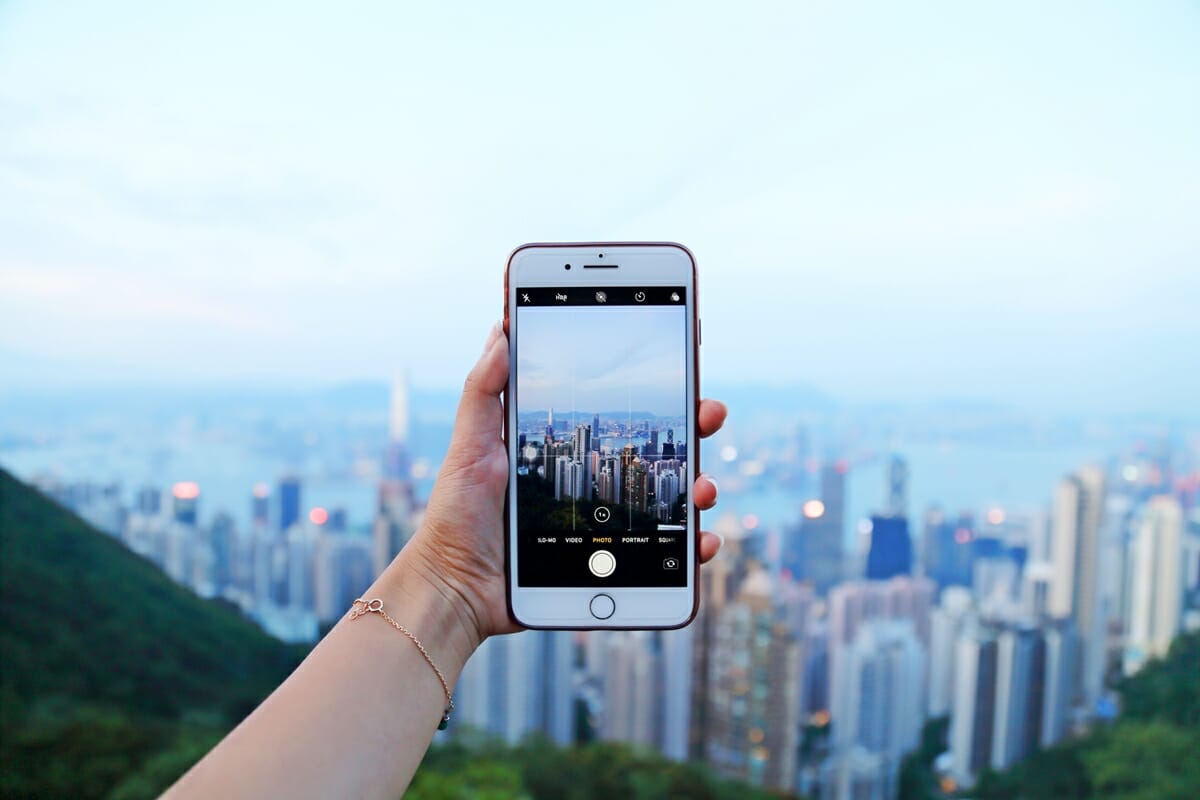
For the first 3 years of running Yoga, Wine & Travel I didn’t use or own a DSLR, point-and-shoot or mirrorless camera. For the longest time prior to investing in my DSLR it was just up to me and my trusty 8 megapixel iPhone 6 to capture photos of my travels and yoga journey. I’m here to tell you that, especially these days, you can rely on your smartphone to take breathtaking photos that you can look back on for years to come! And much of the time, you simply can’t beat the portability and maneuverability of a smartphone.

Up until about 2015, I didn’t always take photos while traveling, it just wasn’t something I was used to doing. In the past, my phone’s camera roll was full of overexposed and sometimes blurry shots, accidental floor snaps (you know what I’m talking about) and I haven’t (and will never) master the “art” of the selfie. Gradually learning to document my travels through photography has, in a way, changed the experience of traveling. I now think more critically about composition and framing shots, leading lines and most importantly, the practice of taking travel photos has driven me to become more observant of what’s around me and keep my eye out for interesting details.

If you also rely on your smartphone for travel photography, fear not! My photography skills are still not quite where I want them to be, but here are some easy mobile photography tips and tricks that I’ve picked up along the way that have helped me to take (and edit) better photos with my phone, I hope you find these useful!
1. Make sure your lens is clean
No, this is not a cop out tip! Our phones are often in our pockets, bags or hands and the camera lens often gets dirty and greasy without us even realizing it. I can’t even tell you the number of times I’ve taken photos at the beach, only to find out I smeared sunscreen all over the lens so every shot came out blurry: devastating. These days I maniacally wipe my lens down in between shots with whatever I can get my hands on: my shirt, a tissue, my boyfriend’s shirt…the list goes on.
2. Use natural lighting and shoot away from the sun

This is especially true for smartphone photography and unfortunately shooting into the light often results in photos coming out overexposed or too dark. To adjust focus and exposure, tap your screen and slide your finger up to increase exposure, down to darken. You can also hold your finger down to “lock” the settings. If you’re not happy with how the photo is turning out, try using the HDR function.
HDR works by balancing the shadows and highlights of a photo but doesn’t always work 100%. Read these posts for more on when to use HDR (and when not to): here and here.
3. Avoid zooming in
Photos taken with digital zoom tend to be much much grainier, though these days phone cameras are getting more and more sophisticated with optical zoom. So instead of relying on the zoom function, move closer to snap your picture (without falling off a cliff) and you can always crop the image later. Even if you have access to any smartphone after the iPhone 7 Plus that offers optical zoom (instead of digital zoom), I’d recommend avoiding this function unless you absolutely have to – even the latest and greatest iPhone 14 Pro only offers 3x optical zoom, any zoom beyond this is digital. Here are the differences between optical zoom versus digital zoom.
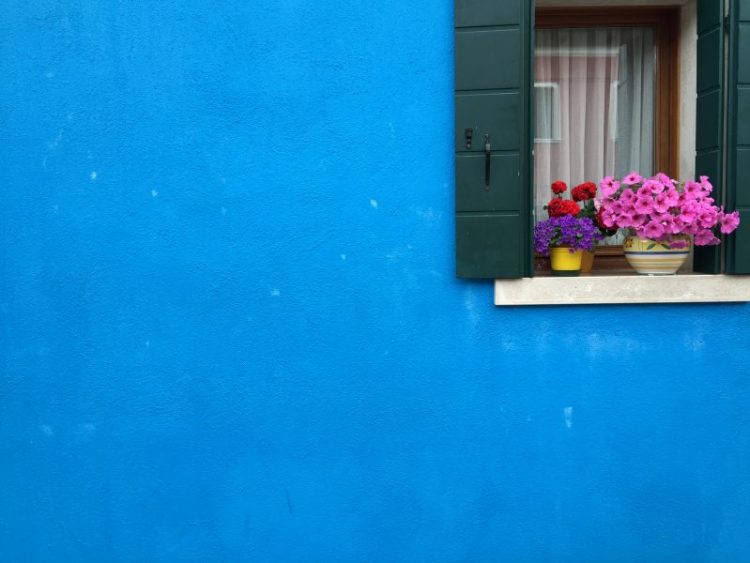
4. Consider your composition: framing, rule of thirds, leading lines

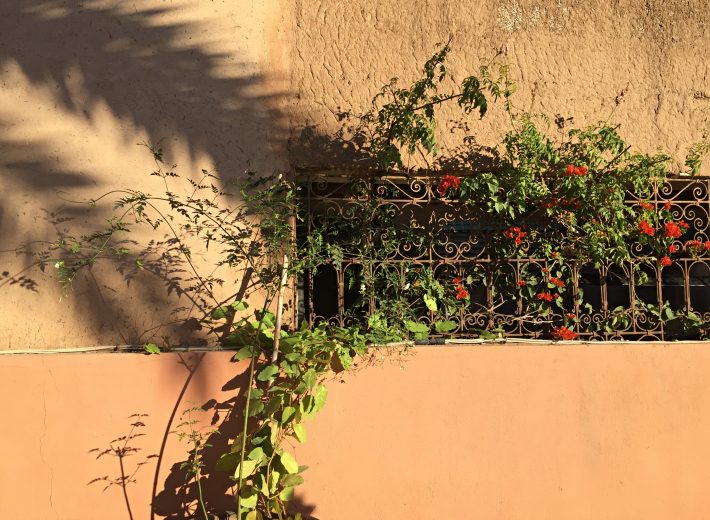
Framing is a technique to draw attention to the main subject of the photo by using something around the edge of the photo to block parts of it. It can help to create some depth and can help to make your photo more visually interesting.

Look around for flowers, bushes, trees, windows – you get the point! Here is framing in action in Venice at the Bridge of Sighs.

The “rule of thirds” helps to balance out the composition of the photo and the idea is that an off-centre composition looks more natural and creates a more visually “interesting” photo.
This is a great article illustrating the rule in action. Here is one of my easiest smartphone photography tricks: to help you execute the rule of thirds turn on your phone’s grid setting. For iPhones, go to Settings – Camera – and then flip the switch to turn the Grid on.
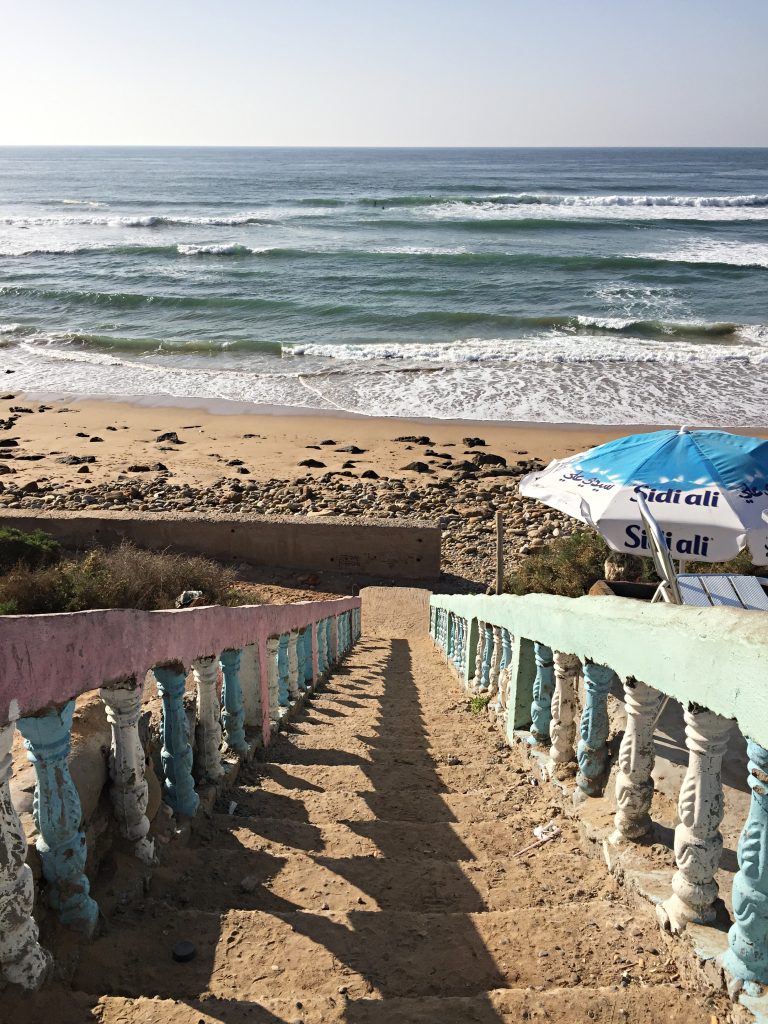
Leading lines is a technique used to help to draw the viewers eye to the main focus of the photo. Leading lines can be found in tons of places: roads, stairs, alleyways, rivers, the list goes on!
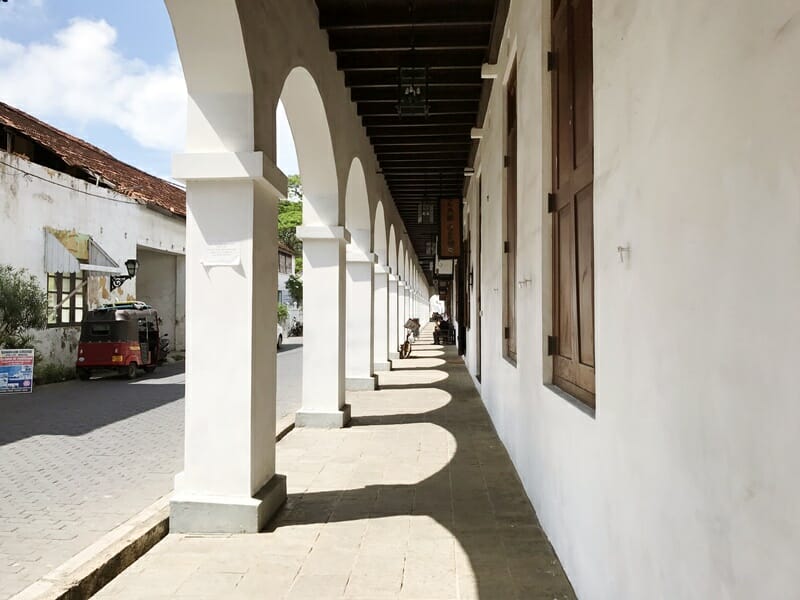
Here’s another example of the leading lines technique being applied to a yoga photography shot:
5. Take the same shot in both landscape and portrait format
The same shot can look very different in both orientations, and if you know you probably won’t revisit that particular spot or get to take the same shot again, you’ll want to take a few photos in landscape and portrait format.


You can always decide which ones you want to keep afterwards! Here is an example, both photos were taken a second or two apart and I haven’t edited either photo so you can focus on the difference in orientation.
6. Be on the lookout for interesting details
A shot doesn’t have to be busy for it to be captivating. This shot remains one of my all-time favorites but its beauty is in its simplicity and tones.

You can also be on the lookout for interesting shadows and contrast – you’ll be surprised how many different ways you can frame the exact same shot!
7. Check your screen brightness levels
Sometimes I’ll forget that my screen brightness is super dim, and edit a photo so much that it’s way too bright or way too saturated. Or, I won’t edit a dark photo enough because my screen is really bright – you get the picture (har har – I’ve always been a fan of a good pun). When you’re editing (and before you post), make sure you’re happy with the photo at any brightness setting!
8. Correct the perspective


So you’ve taken a photo and it kind of looks a little off because it was taken from too high up or too low down, or too slanted from the left or right. You can fix minor slant issues with the “adjust” function in Instagram or other photo-editing apps and tools. Here’s a useful article to read on the perspective function, and here’s an example of how I used function to “un-tilt” this photo that was taken from a lower angle. Pay attention to the pipe on the right to see the difference it makes.
While you’re at it, make sure that your photo is level and straight, especially if you’re capturing a photo that includes the horizon – you’d be surprised how much of a difference rotating your photo by 0.5 degrees can make!
9. Get rid of unwanted elements from your shot

Touch Retouch is a seriously incredible app ($1.99 in the Apple app store) that lets you remove unwanted objects from your photos. I’ve found that it works best when you’re removing objects or people from photos of water or more solid backgrounds. Don’t ask me how it works, but it’s pure magic and one of my top phone camera tips for beginners.

Here’s an extreme example of how I used it to remove a bunch of people and a no-swim barrier from a photo of the Skradinski Buk in Krka National Park. I’ve also used it to remove birds, rubbish bins and other random things from my shots.

However, you might also want to consider that is the “busy” elements of a photo that make it interesting and bring more life to the photo. For example, these umbrellas on a beach in the Algarve, in my opinion, makes the photo more colourful and vibrant!
10. Leverage good editing apps
There are a ton of great photo-editing mobile apps out there. My favorites are Afterlight and A Colour Story. Some other popular apps include VSCO and Lightroom. Instagram’s in-app editor, while not perfect, is pretty good for photos that don’t need much editing. The lux feature (tap the sun icon at the top of the screen) is a good way to slightly up the vibrancy of photos and balance out some dark spots.
11. Make your phone work for you
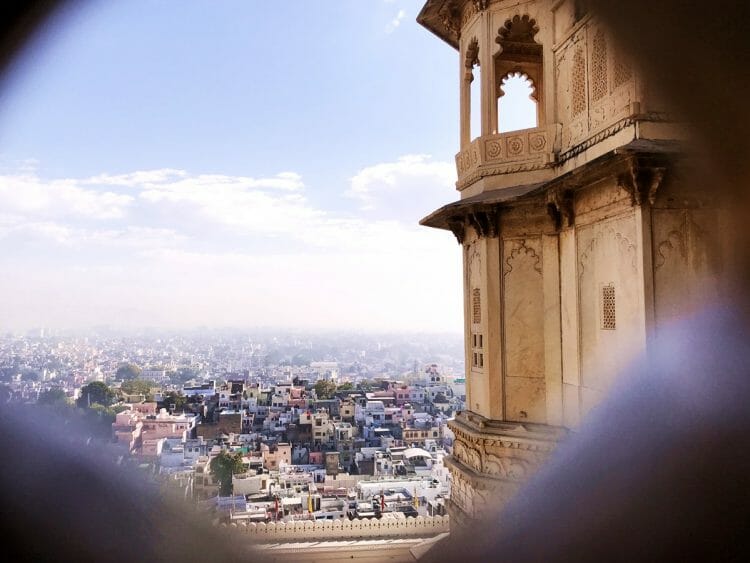
This is one of the best mobile photography tips: as a professional photographer friend wisely reminded me, take advantage of the fact that your phone is a small and light device and use it to find new angles – check out some of Fabio’s professional photos here! Your phone’s camera lens can get where some professional cameras cannot. For example, this photo looking down Giotto’s Campanile in Florence was taken by sticking my phone’s camera lens through steel grating, or the photo above of Udaipur from the City Palace.

That’s it! I hope these tips and tricks help you to take better photos with your phone. What are some other good tips you have up your sleeve? Share them with me in the comments section below!
Enjoyed this guide? You might also like these reads:
- You don’t need to master any complicated software to edit your photos. Here are some of my favorite easy photo editing programs
- For even more travel tips check out this list of essential travel tips and tricks
Want to see more of my travel and yoga photos? Follow me on Instagram!
Pin this for later

Enjoyed reading this article? Subscribe to the mailing list!
* Unsubscribe at any time. Your e-mail address will only ever be used to send the occasional Yoga, Wine & Travel newsletter.


Love this post! I am continually trying to up my game when it comes to photos and your tips are amazing. Love your Italy pictures too, ugh I want to go back so badly! Also, thanks for joining #FlyAwayFriday lady. So happy we are following each other and I can see your fabulous posts. Have a great weekend! Xox Chloe @timetravelblonde
Thanks so much for checking this out, Chloe!
Woah I need that app that removes the unwanted stuff from your photos – that’s a serious game changer!
Thanks for the tips with this post. I have a camera (it’s a bridge so between a point-and-shoot and DSLR) but it’s a pain to carry around and I don’t always take it everywhere so I’m trying to get better with my phone. Honestly a lot of phones take such good photos nowadays that you probably don’t even need to carry a camera unless you’re doing it professionally. People have often shown me photos they’ve taken with their phones that are better than I’ve taken with my camera!
I love my phone for photos! The only thing is that it doesn’t so poorly in the dark/at dusk, and you can pretty much never shoot into the light. I’m a massive sunset fan so would love a camera for this!
Great tips! I take all of my photos on my iPhone 6 as well, and I’m happy with the overall quality. I’ve considered investing in a “real camera” to improve photos for my blog, but it’s really so much easier when all you have to carry around is your phone–I always have it with me anyways!
The portability is a massive selling point! I’ve heard the mirrorless cameras are good, light options so I will be looking into that!
I really like your tips especially the ones related to apps. I need that app that removes objects! Your photos are great. Would be nice to see you taking photos with an actual camera (which is not as compact as a phone).
Thanks Ruth! Definitely looking into different camera options at the moment. What do you use?
Checking your screen brightness is so important! My phone battery life is pretty horrible, so I keep my screen brightness turned waaay down so that it will last longer. For the longest time, I didn’t clue in to what my photos would look like on a normal screen, and ended up with super saturated images (definitely over-edited!). Lesson learned!
I spend way too much time on Instagram so I try to keep my screen brightness on low to conserve energy. I definitely learned the hard way as well!
These are great tips! Even though we have a camera, our phones usually end up being the most accessible and therefore our go to. We use Snapseed and VSCO and have learned that just playing around on those for a bit can introduce you to ways to improve photos you never would have thought of before. Next step for us is to work on composition 🙂
Thank you for taking the time to read this, Kelly! Absolutely agree – there are lots of different ways to experiment with editing tools and it’s fun to see how different editing styles change the look and feel of photos 🙂
Great tips! Just got the Galaxy S7 and am looking forward to seeing how I can make awesome pictures from a cellphone. Gotta love technology!
Ooh! How’s the camera on the Galaxy S7? I think Samsungs take wider photos as well so the shots should come out amazing!
Hi Flo,
I don’t think I have ever commented on a blog. Great shots and tips. Few cameras you may like is Sony A6000 or the new one A6300 can’t go wrong. I have a Lumix G7 which has great video capabilities. So many cameras to choose from but I think you want one you can put in your pocket.
Sean, thank you so much for the ongoing support and amazing recommendations! Will definitely add these to the list that I’m putting together of cameras to look into.
I quickly downloaded that touch retouch app! That is awesome. Thanks for sharing thatone.
Enjoy! It’s addictive. Like, super addictive.
These photos are amazing! They definitely don’t look like you took them from your phone. Also that Touch Retouch app sounds magical. Going to download it right now! Thanks for sharing such great tips!
What an awesome post! I so didn’t know about the app where you can remove objects! I need this in my life! Great tips considering I use both a phone and a SLR.
So glad you found this helpful, Toni! I’d love to expand my range of photography equipment one day but am loving using my phone at the moment!
What an awesome article. I currently use my phone too while saving up for a camera. Hadn’t even heard of the rule of thirds or thought of the layout. Such great advice in here. I’m on my way to download some apps ?
So glad you found this useful, Gee! Let me know how you like those apps – TouchRetouch is MAGIC.
WOW This is so amazing and helpful, some of this I knew , but most of it I did not! Thank you so so much for sharing this..i will share on social media!
So glad you found this helpful, Valerie! Thank you for sharing!
Thanks for the great tips. this is really helpful
Glad you found these tips helpful, Angela!
Great tips! I am still working on #4, that is the hardest to master (or even get better at) for me. I totally follow #5, and am amazed at the difference between portrait and landscape for the exact shot. Beautiful photos.
Thanks for taking the time to read through, Jen!
Flo, this is a great post – absolutely love it! Really helpful too! I don’t own a DSLR either so it’s all about great apps! xo
Thank you so much Kana! I absolutely love your photos as well 🙂 x
I can’t believe you take all these great pics with just your iPhone. Shows what a good eye you have! The best camera is the one you have at the time.
If you’re thinking of a new camera, take a look at the Sony RX100, Mark III. It’s expensive (USD$450), but pocketable and more importantly it has a huge chip in (a full size DSLR chip!) and is amazing at taking night and lowlight pics. (The newer versions shoot 4K, but you don’t need that, just hogs all your storage). I also carry a Canon 5D lunker, but honestly it is becoming harder to tell the difference in quality between the two. The zoom on the Sony isn’t the best, but that’s why you can fit in your pocket. If you want a bigger zoom, Sony has a new RX10 that is the same camera and chip but a big zoom on it. Still it’s much smaller than a typical DLSR.
Thank you so much for these amazing recommendations, Dan! I will definitely look into these options. Your photos and videos are ridiculously professional 🙂
Hey Flo! Thanks so much for sharing this post – I’ve been trying to find a few good photo editing apps for my phone. Going to check out Touch Retouch, Afterlight and A Colour Story now 🙂
So glad you found it helpful, Summer! Let me know how you find those apps 🙂
Thanks for these awesome tips, Florence! I’ve only recently been starting to take both landscape and vertical shots. We need them for all those different social media channels which have different optimal image sizes haha.
Thank you for taking the time to read through, Cynthia! And absolutely – Twitter and Facebook seem to favor landscape shots, whereas Pinterest loves vertical photos. You can always delete the extra shots later, right? 🙂
GREAT tips! I have been thinking I need to get a “real” camera but I’m just going to try these tips instead. Thanks!
There are definitely advantages to using your phone to take photos! I haven’t gotten around to getting a “proper” camera and I want to make sure that I can make the most of it, so still in the research stage. Let me know when you’ve tried some of these tips 🙂